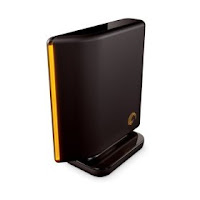
A few weeks ago, I've bought an external USB drive. I chose a Seagate FreeAgent Desktop 500Gb, even though I knew it would not work 100% smoothly in
Ubuntu. Anyway, I've read around about the problems it might give in linux and I was well prepared to solve them. Unfortunately the only problem I encountered after I bought it, was different from anything I've read on the various forums I browsed before buying.
Basically, the disk automounted only the first time I plugged it in my PC. From that moment on, when I plug it in, the front led would blink for some time, but nothing else would happen. I tried to unplug both the USB cable and the power cable, which seemed to work for some people, but it wouldn't solve my problem.
So, I had to solve in some other way.
I've found this "workaround" online, but I can't find the link anymore. Anyway here is what I did, for those people who might be interested:
STEP 1:Open a terminal and give the following command:
sudo vol_id /dev/sd##
Where "##" is the partition of the FreeAgent drive (letter and number change from system to system, you just have to guess yours if you don't already know it. Mine, for example, is "d1", making the command "sudo vol_id /dev/sdd1").
This command will report a few info about your disk. Copy the UUID code of the disk/partition, it's a long series of numbers (and sometimes letters)
STEP 2:Edit
/etc/fstab and add the following line:
UUID=longnumber /media/MOUNTPOINT FILESYSTEM user,defaults 0 0
where:
longnumber is the uuid code of the partition you obtained in Step 1
MOUNTPOINT is the directory where you want the disk to be mounted (create the directory if you don't already have it: "sudo mkdir /media/MOUNTPOINT")
FILESYSTEM is the filesystem present on the drive (ntfs? ext3? vfat?)
user should let you mount the Freeagent hard disk without root permissions (but it did not work for me, see below)
STEP 3:Create a script to mount/unmount your drive (change parameters where necessary).
Save it (I called it 'freeagent'), make it executable and copy/move it somewhere in your path (for example /usr/local/bin)
#!/bin/bash
if `mount grep -q /media/MOUNTPOINT`
then umount /media/MOUNTPOINT
else mount /media/MOUNTPOINT
fi
You then plug the USB drive, wait until its led stops blinking and then launch the script from a terminal (you can also create a shortcut on your desktop for ease of use, if you want).
It works this way: it checks whether the disk is mounted. If it is, it unmounts it. If it's not, it mounts it.
As I said in Step 2, the
user option we wrote in the
fstab should mount the disk without the need for root permissions, but it did not work for me. I had to edit the script and add "sudo" before 'umount' and 'mount' to make it work:
#!/bin/bash
if `mount grep -q /media/MOUNTPOINT`
then sudo umount /media/MOUNTPOINT
else sudo mount /media/MOUNTPOINT
fi
If you are making it a desktop shortcut to be launched by clicking on it, change sudo with the "graphical" command needed by your desktop environment (for example: "gksu" if using Gnome or "kdesudo" if using KDE).
 Fellow blog reader Helder (thanks!) reports his experience in expanding his SI1520's memory over the limit of 2Gbs, which is what is stated in the official specifications of this laptop:
