Showing posts with label solution. Show all posts

Monday, November 30, 2015

Slow shutdown/reboot when mounting CIFS/SMB shares on Ubuntu and derivatives

My laptop with Linux Mint 17.2 suddenly started taking full minutes for every reboot/shutdown. What might have caused it?

I then remembered I had previously placed some new entries in the fstab, since I needed to mount some remote CIFS shares. Could this be the culprit?

Well, it seems it was exactly that: there is a bug in Network Manager which shuts down before unmounting the network shares. This will cause CIFS to hang and wait for 60 seconds or so for every share.

Even though the Ubuntu Wiki says that this bug has been solved since version 12.04, I have applied the suggested solution and it worked.
Now the shutdowns/reboots happen in an instant!

So, is the bug back? I don't know, but what I know is that this is how to fix this problem:
sudo ln -s /etc/init.d/umountnfs.sh /etc/rc0.d/K14umountnfs.sh
sudo ln -s /etc/init.d/umountnfs.sh /etc/rc6.d/K14umountnfs.sh

Thursday, November 26, 2015

Disable touchpad while writing

I'm now running Linux Mint 17.2 "Rafaela" on my Amilo SI1520, but even though there is a specific option to disable the touchpad while writing (you can find it in Preferences > Mouse & Touchpad) this solution wouldn't work.

The workaround is easy though, and can be accomplished by using the command syndaemon:

syndaemon -d -i 1
This disable the touchpad while typing on the keyboard, and will enable it again 1 second after the last key has been pressed. The -d option makes the command run as a daemon.

If you only want to disable tapping and scrolling (but not the mouse movements) when you type, just add the -t option:

syndaemon -d -t -i 1
To avoid having to type the command every time you logon, simply put the command above as a new entry in System > Preferences > Startup Applications

Wednesday, March 19, 2008

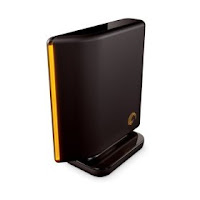
Seagate FreeAgent Desktop USB Drives on Ubuntu 7.10

A few weeks ago, I've bought an external USB drive. I chose a Seagate FreeAgent Desktop 500Gb, even though I knew it would not work 100% smoothly in Ubuntu. Anyway, I've read around about the problems it might give in linux and I was well prepared to solve them. Unfortunately the only problem I encountered after I bought it, was different from anything I've read on the various forums I browsed before buying.

Basically, the disk automounted only the first time I plugged it in my PC. From that moment on, when I plug it in, the front led would blink for some time, but nothing else would happen. I tried to unplug both the USB cable and the power cable, which seemed to work for some people, but it wouldn't solve my problem.

So, I had to solve in some other way.

I've found this "workaround" online, but I can't find the link anymore. Anyway here is what I did, for those people who might be interested:

STEP 1:
Open a terminal and give the following command:

sudo vol_id /dev/sd##

Where "##" is the partition of the FreeAgent drive (letter and number change from system to system, you just have to guess yours if you don't already know it. Mine, for example, is "d1", making the command "sudo vol_id /dev/sdd1").
This command will report a few info about your disk. Copy the UUID code of the disk/partition, it's a long series of numbers (and sometimes letters)

STEP 2:
Edit /etc/fstab and add the following line:

UUID=longnumber /media/MOUNTPOINT FILESYSTEM user,defaults 0 0

where:
longnumber is the uuid code of the partition you obtained in Step 1
MOUNTPOINT is the directory where you want the disk to be mounted (create the directory if you don't already have it: "sudo mkdir /media/MOUNTPOINT")
FILESYSTEM is the filesystem present on the drive (ntfs? ext3? vfat?)
user should let you mount the Freeagent hard disk without root permissions (but it did not work for me, see below)

STEP 3:
Create a script to mount/unmount your drive (change parameters where necessary).
Save it (I called it 'freeagent'), make it executable and copy/move it somewhere in your path (for example /usr/local/bin)
#!/bin/bash

if `mount grep -q /media/MOUNTPOINT`
then umount /media/MOUNTPOINT
else mount /media/MOUNTPOINT
fi

You then plug the USB drive, wait until its led stops blinking and then launch the script from a terminal (you can also create a shortcut on your desktop for ease of use, if you want).
It works this way: it checks whether the disk is mounted. If it is, it unmounts it. If it's not, it mounts it.
As I said in Step 2, the user option we wrote in the fstab should mount the disk without the need for root permissions, but it did not work for me. I had to edit the script and add "sudo" before 'umount' and 'mount' to make it work:

#!/bin/bash
if `mount grep -q /media/MOUNTPOINT`
then sudo umount /media/MOUNTPOINT
else sudo mount /media/MOUNTPOINT
fi

If you are making it a desktop shortcut to be launched by clicking on it, change sudo with the "graphical" command needed by your desktop environment (for example: "gksu" if using Gnome or "kdesudo" if using KDE).

Friday, May 4, 2007

CPU frequency scaling in Ubuntu

I've managed to activate CPU frequency scaling of my SI1520's Core 2 Duo processor in Ubuntu Feisty.
Everything passes through the CPU Frequency Scaling Monitor Gnome applet, which must be reconfigured to enable manual CPU frequency scaling.

The shell command to do this is:

$ sudo dpkg-reconfigure gnome-applets

You will have to answer “Yes” to the question regarding setting the suid of the cpufreq-selector executable. Now you can left click on the CPU Frequency Monitor Applet and choose the CPU frequency and/or operative mode (Conservative, Ondemand, Powersave, Performance).

Thursday, April 26, 2007

Ubuntu Tip: Disable Synaptics touchpad while typing

Finally!!
If you are like me, and can't help but involuntarily touch the touchpad while typing on the keyboard, here is the solution (thanks to ubuntugeek.com):
  1. Open a terminal and type: sudo cp /etc/X11/xorg.conf /etc/X11/xorg.conf_synbackup
  2. Type gksudo gedit /etc/X11/xorg.conf
  3. Look for the section called: Section “InputDevice” / Identifier “Synaptics Touchpad”
  4. Just above the line that says "End Section" type this line: Option “SHMConfig” “on”
  5. Save, close all the windows and restart Gnome (Ctrl-Alt-Backspace)
  6. Open the sessions manager: System -> Preferences -> Sessions
  7. In the Startup Programs tab click the "New" button
  8. Type "Syndaemon" in the name field and "syndaemon -i 1 -d" in the command field
  9. Close and restart Gnome (Ctrl-Alt-Backspace)
  10. Voila!

Monday, April 16, 2007

Touchpad finally working again after a Suspend/Resume in Feisty

As suggested by fellow user skipper (who I thank very much) there is a way to make the touchpad work after a suspend/resume.

The solution is a downgrade of the BIOS of the laptop to version 1.10. The problem, in fact, seems to be related to the two latest versions of the BIOS (v1.19 and v1.20). Anyone who does not necessarily need one of these two later BIOS versions, should downgrade to v1.10 to make suspend work.

If your SI1520 does not mount an Intel Core Duo (Yonah) D0 stepping processor (which means mainly those CPUs coded T2x00) you can downgrade to version 1.10. Otherwise you'll have to stick with a BIOS version >= 1.17 and with no touchpad after resume. :-(

v1.19 is officially the initial BIOS for Windows Vista 32bit, so downgrading could bring up problems with Vista. I couldn't find anything wrong in my brief test, but I don't plan to be using Vista much, so that's not so important to me.

Please leave a comment with your experiences with this matter, as it can help other fellow SI1520 owners. Thanks.

Necessary legal disclaimer:

Reasonable effort is made to ensure that the information provided on this blog is accurate, however, no guarantees for the currency or accuracy of information are made. This blog's information is provided "as is", without warranty of any kind, whether expressed or implied.

This blog and its author make no guarantee and hold no responsibility for any damage, injury, loss of property, loss of data, loss of any and all resources, or any negative influence what-so-ever, that may result from any and all usage of the information found on this blog, or linked from this blog.

Negative consequences of your usage of this blog are solely your problem and your responsibility. All consequences of the usage of this blog do not involve this blog and its author, at all, ever. You hold full responsibility for your actions.

Use this blog's information resources at your own risk.